
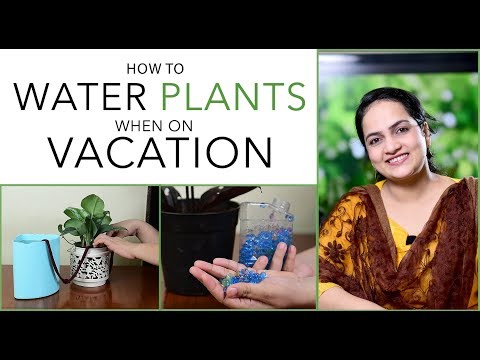
How to Water Plants While Away on Vacation: 6 DIY Methods
You’re ready to go on vacation and leave your responsibilities behind. But in order not to lose touch with your plant babies, make sure they are protected. You’ve taken such good care of them you won’t wish to see them withering away. Luckily, you can find easy, long-lasting and frugal solutions to this problem. We have six ways to water your plants without a babysitter because they can take care of them even when they are sensitive. During your beach vacation, you will feel at ease thanks to the vacation plant watering system.
Method One: Glass Bottle Solution
Don’t throw away your empty bottles of sauvignon blanc. They can be used to water plants while you’re away. Or you can use them on a regular basis to minimize watering. It is also possible to use a decorative bottle with an interesting design to add to your planter or pot. Make sure that the bottle has a cap and not cork. This solution can also be re-used by simply refilling it after the plant has consumed all the water.
Project time: Less than 10 minutes
Materials + tools needed:
- Hammer
- Nails
- A bottle with an aluminum cap
- Pliers
First, puncture holes in cap. You will need pliers to remove the plastic film from inside the cap. Next, hammer a nail through the aluminum cap, creating five small holes. To avoid warping the aluminum cap, start with the nail from the inside.
Second, fill the bottle with water. Remove the cap from the bottle, fill it with water, and place the lid back on.
Third, place the bottle into soil. Make sure you dig a hole in the soil just outside the plant you’re going to water. Put the bottle in the hole you dug (cap side first) and refill after a long weekend!
Method Two: Houseplant Bath
It may seem obvious that you take baths, but did you know that you can bathe your plants? Yes, you can certainly let your plants soak in some bath water while you’re away. Note that this method is best suited for plants that require a lot of water, such as tropical plants and plants with low sun needs since the bathroom usually gets the least amount of lighting.
Project Time: Five minutes
Materials + tools needed:
- Towel
- Sink or bathtub
- Well-draining potted plants
First, fill up your bathtub or sink. Put a few inches of water in your bathtub or sink (depending on how many plants you will take care of while you’re away).
Second, lay out a towel to cover the tub or sink. Make sure the pots of the plants are covered with a towel so they do not scratch the tub or sink.
Third, place your plants on the towel in the bath. Place plants in the sink or tub, and make sure the plants are in pots with good drainage, which will absorb the water as it soaks through the roots. This method should last a week.
Method Three: Water Wicking Drip System
A simple cotton string is used to connect your plant with a water system. Wick watering works best for long-term care. The more water you provide in the external vases or buckets, the longer your plants will remain healthy. Those who have multiple plants can benefit from this system, as you can water multiple plants at the same time.
Project time: Five minutes
Materials + tools needed:
- Cotton rope
- A vase or bucket
First, cut the cotton ropes. The cotton rope is the best material to use, as it easily absorbs water from the soil and facilitates easy potting. There needs to be slack on the end of the rope inside the vase and the rope also needs to reach under the soil several inches. Cut ropes for each plant that needs watering.
Second, place ends of rope in the soil and water. Each rope end should be buried several inches under the soil of the plant, and the soil should be covered to ensure it stays. In addition to placing the ropes into the soil, you can also use pencils to tuck the ends of each rope into the soil. Leave the other end to hang loosely into the vase or bucket of water.
Third, water plant and fill the vase. The process is started by filling the vase with water, then watering the plants. This method is excellent for those who want one arrangement with multiple plants.
Method Four: Plant Saucer Setup
Although it’s among the simplest solutions, you probably shouldn’t use it for especially sensitive plants. In addition to retaining water for your plants, saucers keep the soil from escaping from the bottom of your pot, so that everything remains tidy while you’re away.
Project time: One minute
Materials + tools needed:
- Saucer
- Drainage pot
First, select a saucer. A saucer for a pot keeps the water from running out, so it’s important to find one that is the same size or slightly larger, so the saucer has room to hold water, while also keeping the bottom of the pot dry.
Second, place your plant in the pot. It is important to use a drainage pot for the plant to reach the water contained in the saucer.
Third, soak the saucer or place water in the saucer. The saucer can either be submerged in water or filled with more water so the plant can drink while you are away.
Method Five: Tiny Plastic Bag Greenhouse
Neither a wall nor a roof are required for this method, which is simple and a good long-term solution while you are away from your plants. Be careful to follow instructions on this strategy to protect your plants’ foliage. Avoid using this technique on plants that are unable to face direct sunlight or on succulent plants since they could overheat or shrivel.
Project time: 15 minutes
- Materials + tools needed:
- Four wood stakes
- Clear plastic bag (large enough to fit over the plant)
First, insert the wood stakes. Put four wood stakes in each corner of the pot. This will serve as the base of the greenhouse plastic bag tent, thus preventing the plastic from wrapping around the leaves.
Second, water and place in indirect sunlight. Keep your plant in indirect sunlight rather than direct sunlight, as direct sunlight might overheat the plastic bag and kill your plant. You should not overwater.
Third, wrap your plant in the plastic bag. Make sure that your plant is completely covered in plastic. Place your stakes well enough so that the leaves aren’t touching the bag. This will secure the bag in place. Wrap the plant in the plastic bag and let it dry. You can leave the leaves on the plastic bag if they touch slightly. The tiny greenhouse will collect any moisture that evaporates back into the plant.
Method Six: Plastic Water Bottle Planter
The plants in your garden can also drink from plastic bottles, making it a fantastic way to reuse bottles. Although this system won’t last very long, it’s very simple to use, just fill the bottle as needed!
Project time: Five minutes
Materials + tools needed:
- Plastic water bottles (size varies due to plant size)
- Nails
- Hammer
First, puncture holes on the bottle. Pierce the side of the water bottle with about six holes, and the bottom with about three holes.
Second, place the plastic bottle into the soil. You should first water your plant’s soil, allowing the self-watering method to last longer. This way, your plant won’t consume the entire water from the bottle when first watered. The plastic bottle should be sunk into the soil with the cap extending about one or two inches above the ground.
Third, fill up the water bottle. Make sure the bottle is filled with water and capped. In this way the water will not evaporate and instead drain into the plant. Plants owners who travel for a long weekend or do not water their plants every day will benefit from this strategy. You can use it again simply by refilling the water bottle.