Transplanting hydroponic plants may seem intimidating for beginners.
But with the right simple steps, you can ensure your hydroponics thrive in their new homes.
As an experienced hydroponic gardener, I’ve learned tips that prevent transplant shock and help plants quickly re-establish.
This guide will walk through the easy process and share pro advice so your plants continue flourishing.
Let’s dig in!
KEY TAKEAWAY
How to transplant hydroponic plants?
To transplant hydroponic plants, carefully remove them from their current medium and place them into a new one, ensuring the roots are not damaged. (1)
Maintain proper environmental conditions, including nutrient solutions and light levels, during and after transplantation for healthy hydroponic plant growth.
Step-by-Step Guide for Transplanting Hydroponic Plants into Soil
Moving hydroponic plants into soil can be done successfully, but needs some special care to prevent transplant shock.
Here is a simple step-by-step process to transition your hydroponics to a soil environment.
First, prepare the potting mix.
Use a lightweight soil with perlite or vermiculite added to create lots of drainage. This helps prevent wet roots, which can lead to root rot.
Next, water your hydroponic plant fully before removing it from the hydroponic system.
This gives it reserves to withstand the move. Gently remove the root ball and rinse off any growing medium still clinging to the roots.
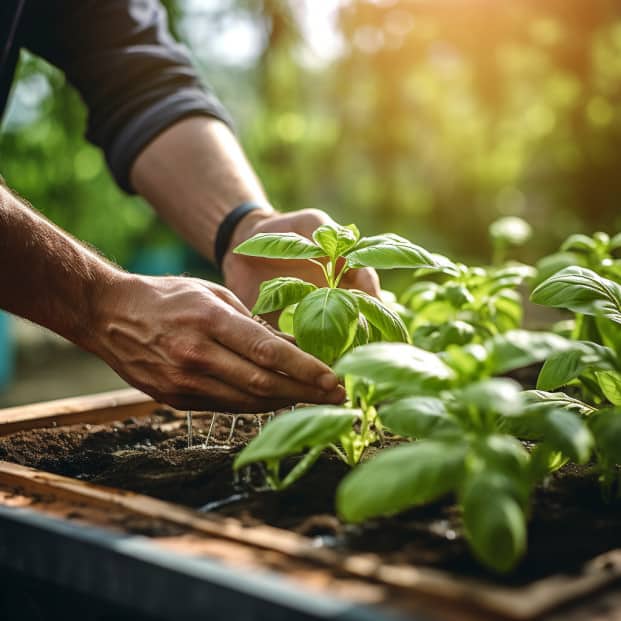
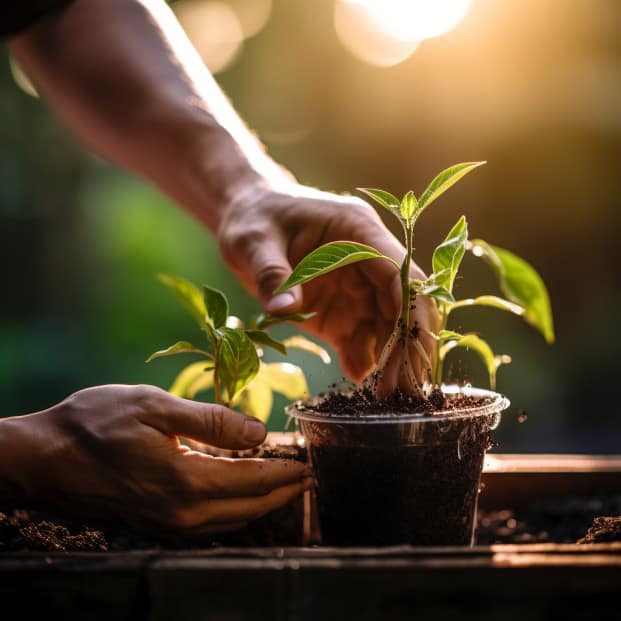
Carefully place the hydroponic plant’s root ball into the soil.
Ensure the top of the root ball sits level with the surface of the soil. Fill in around it with potting mix to stabilize it.
Water the transplanted plant thoroughly.
This helps the roots make firm contact with the soil. Provide bright, indirect light while it establishes over the next week or two.
Monitor for signs of transplant shock like leaf droop or yellowing.
Increase humidity and reduce sunlight if it struggles. Once the plant adjusts, resume normal care.
With this simple process, you can transition hydroponic plants into soil successfully. Just go slowly and provide ideal conditions as it adapts to its new growing medium.
Understanding the Risks of Moving Hydroponic Plants to Soil

While it is possible to transplant hydroponic plants into soil, there are some risks to be aware of during the move:
- Transplant shock – Sudden change in environment can stress plants. Leaf drop, reduced growth, and yellowing are common. (2)
- Root issues – Hydroponic roots exposed to soil can suffer fungal problems or rot if conditions are not ideal.
- Nutrient changes – Switching from hydroponic nutrients to getting nutrition from soil takes adjustment.
- Improper planting depth – Root ball must be at proper soil depth or plant struggles.
- Overwatering – Too much moisture in soil suffocates roots accustomed to hydroponics.
The key is going slowly, providing excellent drainage, and monitoring plants closely.
Increase humidity, reduce sunlight, and avoid overwatering initially to help reduce transplant stress.
With proper care, hydroponic plants can thrive when transferred into potting mix.
Just be patient and ready to troubleshoot during the transition.
Dealing with Transplant Shock: A Comprehensive Guide
Transplanting can be stressful for grown plants.
Here are some tips to help them adjust and have a smooth transition.
When a Transplant is Needed
Transplanting seedlings from their starting containers to larger pots is necessary for them to grow to maturity.
Overcrowding stunts growth.
It is best to transplant when the root systems have filled the starting container but before becoming pot bound.
Signs include halted top growth while roots continue circling the edge.
Growing plants too long in a small space stresses them.
Preparing for the Big Move
A few days before transplanting, start acclimating seedlings to their new home.
Gradually increase sunlight amount by moving them to a brighter window each day.
On the rainiest day, do the job when they are already adapted to more direct sunlight.
Water them well the day before but not the morning so their soil is moist but not soaked.
Making the Switch
Gently remove the plant from its starting container being careful not to damage the fragile root system.
Tease out any circling roots and trim any that look unhealthy. Massage the loosened soil away from the roots with your fingertips.
Set the grown plant in its new container and fill in around the root ball with potting mix, pressing it down firmly to eliminate air pockets.
Water thoroughly after transplanting to settle the soil around the roots.
Caring After Transplant
For the first few days, protect transplanted seedlings from full sun and wind which can dry the soil.
Gradually resume normal care.
Monitor moisture levels and water whenever the top inch is dry.
Newly transplanted plants need extra attention until root systems are reestablished.
With some TLC, they adjust to their new home and large pot to become healthy grown plants.
When and How to Transplant Hydroponic Seedlings

Hydroponically grown plants have different needs than soil-started varieties.
Here are tips for their big move:
Starting Hydroponic Seedlings
Seeds can be started in rockwool cubes, peat pellets or similar media submerged in a nutrient solution like deep water culture.
This hydroponic system keeps roots continually moist . Seedlings are small and tender at transplanting.
Hydroponic growing minimizes shock compared to soil.
Transplanting Time
Monitor roots through the clear containers.
When they have filled the cube or pellet and are just starting to circle, it is time for a larger grow bed or tank.
Overcrowding causes stress like soil, though changes happen faster without competition for water and nutrients.
Transplant Method
Handle the delicate seedling container with care so roots remain intact.
Gently tease open the rockwool and remove the plant, keeping as much of the structure intact as possible for support.
Insert the cub into new grow media like rockwool, coconut coir or clay pellets and secure in the larger container.
Make sure the bottom of the pot or cube remains submerged in the nutrient solution.
Monitor seedlings closely and adjust lights, water and nutrients as needed.
The lack of soil mitigates shock compared to soil plants.
With care, your hydroponically grown plants will carry on growing in their new location with minimal stress.
Benefits of Transplanting Hydroponic Plants: Water Retention and Drainage
Growing hydroponic plants can be an exciting way to enjoy fresh herbs and vegetables without a traditional outdoor garden.
However, many wonder if it is possible to transplant hydroponic plants that have become established in one system to another location or type.
Through trial and error in my greenhouse, I have learned that it is indeed possible to transfer hydroponic plants with a little care and following some simple steps.
One main benefit of transplanting your hydroponic plants is better water retention and drainage.
Plants grown in a deep water or nutrient film technique system may experience conditions that are too wet.
Moving them to another system, like an ebb and flow tray or drip system allows for improved moisture levels around the roots.
It also prevents root rot issues caused by soils staying overly saturated.
Another perk is being able to move plants outdoors to enjoy their growth and harvests in a different controlled environment.
Essential Tools and Components for Successful Transplantation

Some key considerations when transplanting from soil or an aquaponics setup include the root mass that has developed.
Large, matted roots could be damaged during the shift.
It is best to transplant when root systems are still modest, such as moving seedlings or plants with only a couple of weeks of growth.
Selecting an appropriate new pot or net pot that is only slightly larger also helps prevent root pruning challenges.
Maintaining consistent nutrient levels between the old and new locations also reduces stress on the transplanted plant growth.
A few essential tools make the process safer and more effective.
This preparation prevents delays or forgetting important pieces.
Clean pruning shears or a sharp knife should be on hand to trim any bound roots.
Root-temperature controlled water helps gently separate roots from their original container.
A light, well-draining potting mix or expanded clay balls support new root growth.
And do not forget labels to identify transplanted hydroponic plants!
Proper watering is key to success.
For the first couple of weeks, maintain soil moisture but do not soak.
This allows new roots to establish without rot concerns.
Monitor plant health signs and adjust nutrients accordingly.
With a bit of care, one can revel in the rewards of more productive, stronger, and beautiful hydroponically-grown plants!
The risks of transplanting can be low when diligence and the above step guide are followed.
Overall, transplanting provides flexible gardening options to better enjoy fresh herbs and foods through different seasons.
pH Adjustment for Healthy Hydroponic-to-Soil Transplants
A major key I have found when moving plants from a hydroponic grow system into soil is properly adjusting the pH levels.
Both the water and soil require different acidity to allow plants to best absorb nutrients.
Getting this part right makes a huge difference in how well transplanted seedlings or mature plants can establish themselves in their new growing media.
In a hydroponic system, the pH is usually kept around 5.5-6.5 for nutrient levels to dissolve effectively.
However, most soil-based gardens thrive when the pH range is between 6-7.
Going from the hydroponic level straight to soil could shock tender roots.
The solution is gradually increasing the pH over a couple of weeks before filling the pot with soil.
When watering the plant after being potted, check that the runoff water coming from the drainage holes hits around 6-6.5 pH.
This shows the soil environment has balanced to a pH where the plant can smoothly make the transition.
Going forward, routine pH testing of soil keeps overall conditions in the optimal acidic zone.
Proper pH allows leafy greens like lettuce to continue growing healthy and strong.
A helpful chart comparing hydroponic water to ideal soil pH appears below:
| Nutrient Solution | Soil pH |
| 5.5 | 6 |
| 6 | 6.25 |
| 6.5 | 6.5 |
| 7 | 6.75 |
| 7.5 | 7 |
Having the chart as a guide shows making sure the progression is steady.
Sudden shifts in pH levels place undue stress on transplanted roots setting in.
Following these steps reduces transplant shock risks and gets your harvests off to a thriving start.
Proper pH adjustment proves key to successfully moving your hydroponic grow outdoors or into the garden.
pH Adjustment for Healthy Hydroponic-to-Soil Transplants
The transition from hydroponics to soil brings new considerations for pest control as well.
Without the barrier of a growing container, soil exposes plant roots directly to issues like fungus gnats, cutworms, and damping off diseases.
As a precaution, drenching transplant holes with a natural fungicide or neem oil solution protects vulnerable new growth.
Closely monitoring plants also allows catching potential problems in early stages for easy remedy.
Making the shift with adjustments like pH balancing and pest safeguards helps transplanted crops continue prospering robustly in their changed environment.
Conclusion
Before you go…
Keep your transplants healthy by monitoring their new roots.
Read my next guide to perfect your hydroponic plant care routine.
How To Care For Transplanted Hydroponic Plants: A 10-Step Routine
I hope these hydroponic transplant tips help your plants or snake plants settle smoothly into their new setups.
Let me know in the comments if you have any other questions!
References
- https://www.nosoilsolutions.com/transplant-hydroponic-plant-dirt/
- https://www.theorybeyonddesign.com/blogs/news/how-to-reduce-transplant-shock
Related Articles
- https://allthingsgardener.com/grow-snake-plant-in-water-without-soil-2021/
- https://allthingsgardener.com/ways-to-fix-broken-snake-plant-leaves-2021/
- https://allthingsgardener.com/how-to-splitting-snake-plant/


