Have you looked into raised garden bed plans? Raised beds are popular for a reason, without a doubt.
They not only look beautiful in a backyard garden, but they also save the time and effort required to maintain traditional in-ground beds.
Unfortunately, some raised bed systems are expensive to purchase and install.
However, not all raised bed systems are created equal.
Whether you’re adept with tools or don’t know the difference between a drill press and a driver, there are kits on the market that are simple to put together and need little time or money.
If you have the time or motivation, there are also do-it-yourself possibilities.
Let’s check out Betty’s story
I have been loving my garden since I was very young.
The thing is, taking care of a garden needs a lot of work.
I’m not as strong as I was before.
It hurts my back when I need to trim my plants.
I also can’t crouch now that I have bad knees.
When I found raised bed planters, I tried to buy one.
They said I can avoid getting all my body aching when I’m gardening.
And ….
It’s true!
I can garden with ease now.
It’s also making my house much more beautiful over time.
Can you imagine how much will they make a difference?
Easy gardening and easy for the eyes too.
Let’s get deeper into the benefits of having raised beds planter.
Introduction to Raised Beds
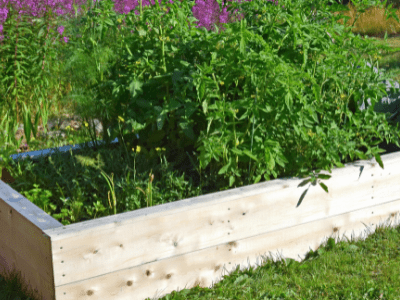
Raised beds are simply soil mounds formed directly on the ground, but they are frequently framed with wood, bricks, or other materials for a tidy appearance.
A blend of high-quality potting soil, compost, and/or leaf mould is commonly used to fill raised beds.
They drain effectively and are ideal for regions that are otherwise difficult to work with, such as stony, compacted, polluted, damp, or nutrient-deficient soils.
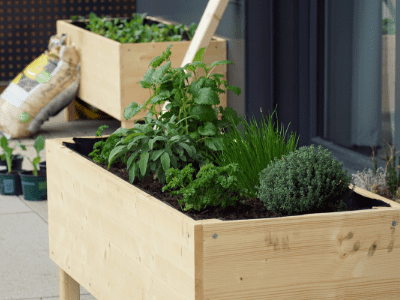
They’re even suitable for usage on hard surfaces.
Netting or shade cloth can be readily added to the edges of the beds by attaching hoops to the edges of the mattresses.
Benefits of These Raised Bed Plans
There are numerous advantages to constructing raised beds that confine and protect your garden soil.
Less Tilling
Traditional in-ground garden beds require more tilling than raised garden beds. Instead of digging up a compacted bed year after year, many gardeners top-dress their elevated beds with compost and other soil amendments in the fall, then let nature take care of the rest during the dormant season. This is beneficial to both the soil and the plants.
Easy on Your Back
Bending, stooping, and kneeling can all harm your back and joints. Raised bed designs are available in a range of heights to make accessing your crops easier on your body in the long run.
Appealing to the Eye
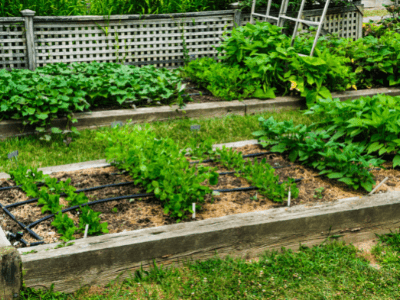
A succession of raised planters bordered by walkways in the backyard or front looks clean and well-tended all year.
Keeps Weeds and Pests at Bay
Rabbits may happily graze in-ground crops growing at eye level, therefore raised garden boxes are known to prevent them. They also make it simple to erect copper slug ‘fence’ and other perimeter deterrents. Raising your beds also means keeping your crops away from pets who might (hum) pee in your garden. If you have weed issues, you can put a weed barrier beneath the soil of your bed during installation to keep invasive plants and tree roots out.
Drainage is Improved
Elevated beds tackle the problem of moist garden soil in the spring by raising the soil above ground level and allowing your plant roots to breathe.
Get a Head Start on the Growing Season
Because of their height above the cold ground and increased drainage, raised beds loaded with nutrient-rich, organic soil warm up sooner in the spring. In this approach, planting beds that are 12 inches deep or deeper provide plants with a longer growing season.
How to Make Raised Garden Boxes & Beds at Home

Learn how to make your own DIY raised garden beds and boxes to enhance your outside space and yard. We’ve been working hard to improve our backyard, as we’ve mentioned in prior postings. We recently constructed a DIY playhouse with a rock wall porch, and we now want to make our own raised planter boxes and veggie beds.
We figured we could give this outside DIY project a shot, even if we aren’t experienced gardeners, to help grow our tomatoes, peppers, herbs, and whatever else we choose to try our green thumb at.
Why Do You Need to Make Raised Garden Boxes?

We wanted a dedicated spot in our garden for producing veggies and herbs. We were also aware that the looser soil of a raised garden bed is intended to aid plant growth.
Our garden used to be on the other side of the home. It was extremely difficult to maintain and care for. We reasoned that by adding planter boxes to our backyard, we would be able to work on our garden while our children played.
This year, these raised vegetable beds or boxes will also make life easier on our backs. This is a significant benefit… And maybe, this implies that my hubby will actually weed and help out.
Raised Garden Plans for Cedar Garden Beds

You must first determine the dimensions of your planting boxes. We’ll talk about our cedar planter boxes, which were 7’0″ long, 42″ broad, and 33.75″ tall.
Materials required to construct a raised garden bed It’s worth noting that our revised design necessitates the use of six posts.
Needed Materials:
- The posts are 3.5″ x 3.5″ x 8′ in size.
- The boards are 11.25″ broad by 0.75″ thick.
- 57 washed river rock or #57 limestone aggregate Bagged concrete
Premade Raised Garden Beds
We looked at purchasing raised planters, boxes, and garden beds before deciding to make this a DIY outdoor project.
Our Recommendations
Prices pulled from the Amazon Product Advertising API on:
Product prices and availability are accurate as of the date/time indicated and are subject to change. Any price and availability information displayed on [relevant Amazon Site(s), as applicable] at the time of purchase will apply to the purchase of this product.
Step-by-Step Guide for DIY Raised Garden Bed Plans
One thing to keep in mind is that we created a third garden raised box and changed the design somewhat to include two additional poles in the middle. To include those directions, you’ll see “new design” throughout this post. We wanted to assure the solidity of our third box, or upgraded design, which is 2 feet longer. This, we believe, is the way to go now, even for the smaller boxes (even though ours have held up the past 1.5 years).
More information on this can be found at the bottom of the page.
- Cut the boards to the desired size. Our posts were 4 feet long, our long sideboards were 7 feet 1.50 inches long, and our short sideboards were 42 inches long.
- Drill 1 x 12 boards prior to assembly. To assist keep wood in place while making your raised vegetable boxes, attach a clamp to the post and cedar board.
- Screw the long sides upright. You must decide whether you want the final (smoother) side to face out or in. This process will be repeated twice more. To leave leeway between the top of the board and the top of the dirt and mulch, our 1 x 12 boards are 3″ above the top of the posts. Add a post in the middle of the boxes for more stability.
- Place the screwed boards on a flat surface, with the bottoms of the posts facing up. For added strength, add a second pair of posts in the centre of the cedar boards.
- Connect the 42″ section. Make sure the connection is square (it’s easier said than done, we know)!
- Place the boards on top of the assembled rectangular garden box. Inside, cedar 2x4s break board joints in half. This will also make it possible for one person to shift the planter boxes.
- Attach the 2 x 4s to the middle posts in the updated design.
- Using a manual post hole digger or a shovel, dig four post holes. If you know you’ll be performing a lot of outdoor DIY tasks, an electric post hole digger can be a good investment (one day I may get on for my husband). This takes some time, but if you’re going to create enormous boxes like we did, you’ll want to do it. Refresh the look: For the extra cedar post in the middle, dig six post holes.
- Poke holes in the planting box. Because our garden boxes sit on a little inclination in our backyard, it was critical that the stakes be set so that the box would not tip over. This will also assist them in remaining level.
- In a wheelbarrow, mix and place bagged concrete. Follow the directions on the ready-mix concrete package.
- Pour the mixed concrete into the holes to install the posts in the ground. Allow the concrete to set for at least one night.
- If your ground is uneven, like ours was, rip more cedar wood to fill in the gaps and secure it to the posts. You must design a barrier to prevent the dirt from escaping. The weed barrier will not be able to support the weight of dirt and other materials on its own.
Sum Up
So, the bottom line is,
It might be rough at the start, but the finished product will make a lot of things easier.
It’s a brilliant way to ease your gardening routine and freshen up your garden look!
Conclusion
That’s everything from us!
Now, this is the time for you to start.
Tell us what you think about this!
After you start, tell us how it goes!


